Difference between revisions of "Building the examples with Eclipse"
From RobotinoWiki
Indorewala (talk | contribs) |
Indorewala (talk | contribs) m (→Prerequisites) |
||
| (One intermediate revision by the same user not shown) | |||
| Line 1: | Line 1: | ||
= Prerequisites = | = Prerequisites = | ||
| − | # Please install the latest [http://www.oracle.com/technetwork/java/javase/downloads/index.html Java Development Kit] | + | # Please install the latest [http://www.oracle.com/technetwork/java/javase/downloads/index.html Java Development Kit]. |
| − | # Also download the [http://www.eclipse.org/downloads/ Eclipse IDE for Java Developers]. You don't need to install this, just unzip the downloaded | + | # Also download the [http://www.eclipse.org/downloads/ Eclipse IDE for Java Developers]. You don't need to install this, just unzip the downloaded zip file in your preferred directory. |
= Building the Camera example = | = Building the Camera example = | ||
Latest revision as of 11:58, 6 December 2011
Prerequisites
- Please install the latest Java Development Kit.
- Also download the Eclipse IDE for Java Developers. You don't need to install this, just unzip the downloaded zip file in your preferred directory.
Building the Camera example
- Run eclipse.exe
- Select your preferred workspace if you haven't done so already.
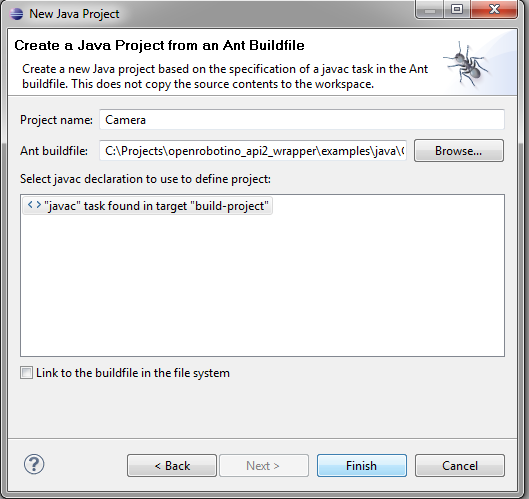
- Once eclipse has started, select File->New->Project from the Menu bar.

- Select "Java Project from Existing Ant Buildfile" by expanding the Java field.

- Navigate to the build.xml file in the Camera folder to locate the Ant Buildfile. Click finish.
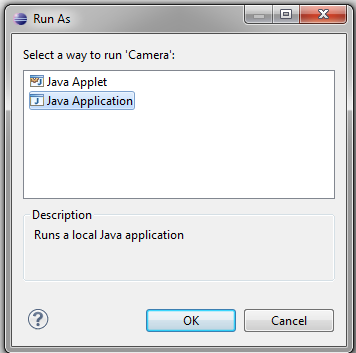
- Once the project has been loaded, build and run it as a "Java Application".
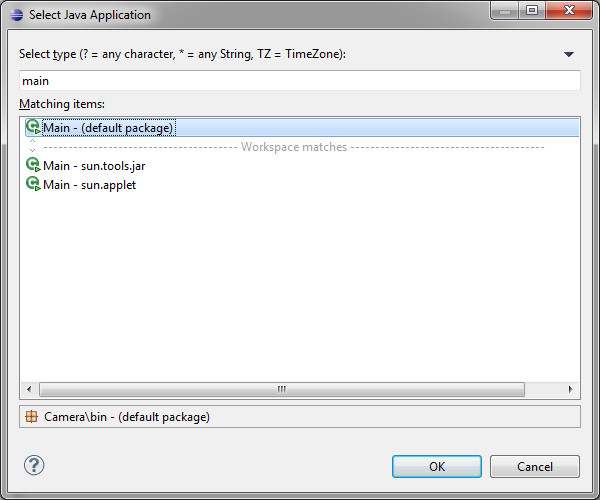
- If the "Select Java Application" window opens then replace the ** by main and then select Main - (default package).
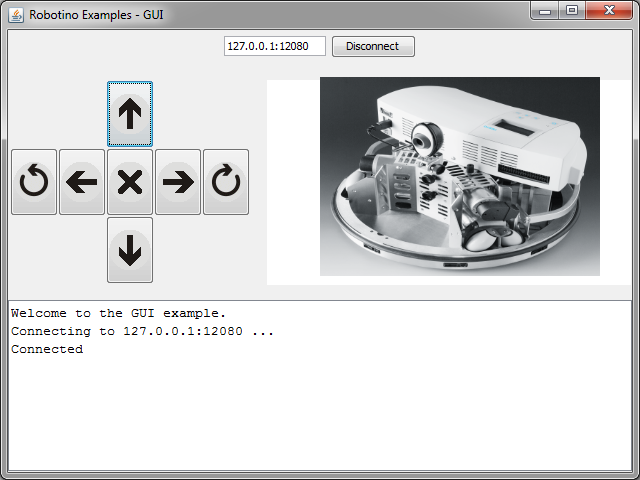
- The application should now run. Type the IP address of Robotino and click Connect.


Other examples
Repeat the same procedure as above to build the other examples.