Difference between revisions of "Robotino3 IO firmware Flashmagic"
From RobotinoWiki
(Created page with "Get Flashmagic from [http://www.flashmagictool.com/ flashmagictool.com]. Use these setting Image:Robotino3_flashmagic.png.") |
|||
| (4 intermediate revisions by the same user not shown) | |||
| Line 1: | Line 1: | ||
| − | Get Flashmagic from [http://www.flashmagictool.com/ flashmagictool.com]. Use these setting [[Image:Robotino3_flashmagic.png]]. | + | Get Flashmagic from [http://www.flashmagictool.com/ flashmagictool.com]. Use these setting |
| + | |||
| + | [[Image:Robotino3_flashmagic.png]] | ||
| + | |||
| + | Log into Robotino3 as root. Kill controld3 and activate second Power-On keeping the system powered up during firmware installation. | ||
| + | |||
| + | <pre> | ||
| + | killall controld3 | ||
| + | /usr/local/robotino/daemons/bin/controld3 -fpgapower 1 | ||
| + | </pre> | ||
| + | |||
| + | The third LED is turned '''off''' indicating that the second power source is '''activated'''. | ||
| + | |||
| + | [[Image:Robotino3_fpga_power.jpg]] | ||
| + | |||
| + | Connect to ISP-connector on Robotino3. | ||
| + | |||
| + | [[Image:Robotino3_RS232_ISP.jpg]] | ||
Latest revision as of 10:25, 6 August 2013
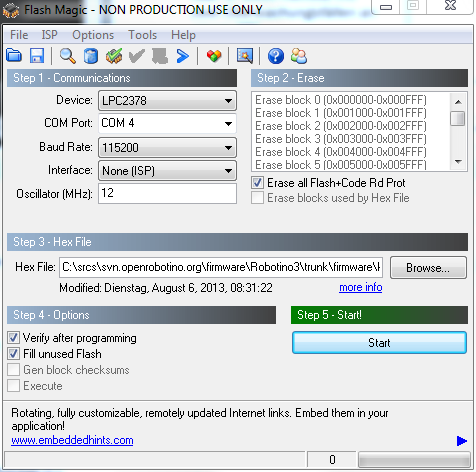
Get Flashmagic from flashmagictool.com. Use these setting
Log into Robotino3 as root. Kill controld3 and activate second Power-On keeping the system powered up during firmware installation.
killall controld3
/usr/local/robotino/daemons/bin/controld3 -fpgapower 1
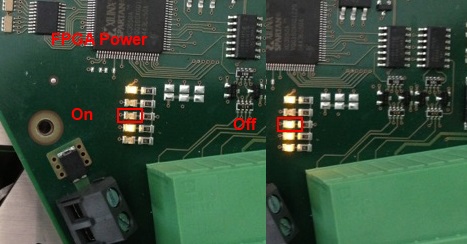
The third LED is turned off indicating that the second power source is activated.
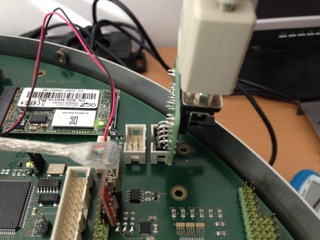
Connect to ISP-connector on Robotino3.


