Nimh
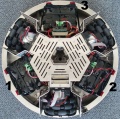
NiMH accumulator sets
Battery holder 1
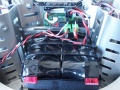
Charger board 1 cabling
Battery holder 1 mounted
Battery holder 2
Battery holder 2 mounted

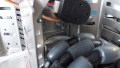
Connector expansion

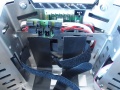
Battery holder 3
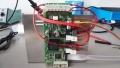
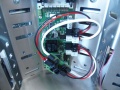
Charger board 3 cabling
Charger board 3 cables to charger 2
Charger board 3 cables to charger 2
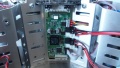
Charger board 3 cables to charger 2
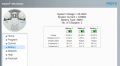
Web interface with three NiMH battery packs installed


Contents
Introduction
Robotino v3 can be equipped with 3 accumulator packs each of which contains 18 NiMH battery cells. Each cell has a capacity of 9Ah and every accumulator pack has 9Ah/21.6V which is about 200 Wh. So with 3 NiMH accumulator packs Robotinos batteries have 600Wh. The average power consumption of Robotino is at about 1.5A at 21V so about 30W. That leads to 20h of operation without the need of charging the batteries.
Assembly
When you order the NiMH accumulators at Festo you get at least 2 accumulator sets and 1 additional charging board. With 2 sets you install set one at position 1 and set two at position 2 (see NiMH accumulator sets for the numbering of the positions). At position 2 you also install the additional charging board.
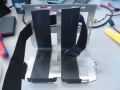
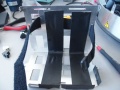
Prepare battery holder at position 1
Take out the battery holder at position 1. Use the duct tape comming with the batteries to tape the parts of the battery holder that will be in contact with the battery packs. This is neccessary to ensure that the batteries will not be damage by long term galling. Put the hook-and-loop tape that held the Pb battery around the battery holder so that the NiMH pack will be fixated at the left side of the holder. The holder's left side at position 1 is the side which is near to the robot's center.
Prepare charger board 1
Connect a connector expansion board to charger 1. The board is later mounted at the battery holder so that you are able to connect the NiMH pack when the holder is mounted in front of charger 1.
Mount battery holder 1
For this step it is recommended that you remove the bars used for carrying Robotino. Place the battery holder you just prepared with the duct tape and the hook-and-loop tape in front of the charger board. Before fixating the battery holder mount the connector expansion board on the battery holder.
Battery 2
If you have two NiMH battery packs only than you can reproduce the steps from position 1. The only difference is that you should prepare the battery holder so that the battery pack is fixated at the right side of the holder.
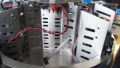
Battery 3
In the case you have three NiMH battery packs you need to connect charger 3 to charger 2. To do so first install charger 3. Prepare holder 3 as shown in the image gallery. Use the duck tape to prevent galling of the battery packs. After mounting charger board 3 at the back of battery holder 3 mount the connector expansion board on holder 3 attach all the cables and put the hook-and-loop tape around holder 3 two fixate the battery pack later. Place holder 3 inside Robotino and install the charger expansion cables (the black/red/yellow and the 14pol ribbon-cable) to make a connection between charger 3 and charger 2.